
Adding products, units, cartons and flavors
One product sold by piece, pack and carton from one stock.
- Reading time
- 3 min read
- Steps
- 6 steps
- Level
- Beginner
- Updated
- Updated October 10, 2026
The POS interface is in Arabic; screenshots and button names are shown as they appear in the app, with English explanations.
The Products page manages the catalog: search, filters, adding and editing, bulk actions and Excel import.
1Open Products
From the side menu choose “Products”. Search by name, barcode or quick code, and filter by category or stock state.
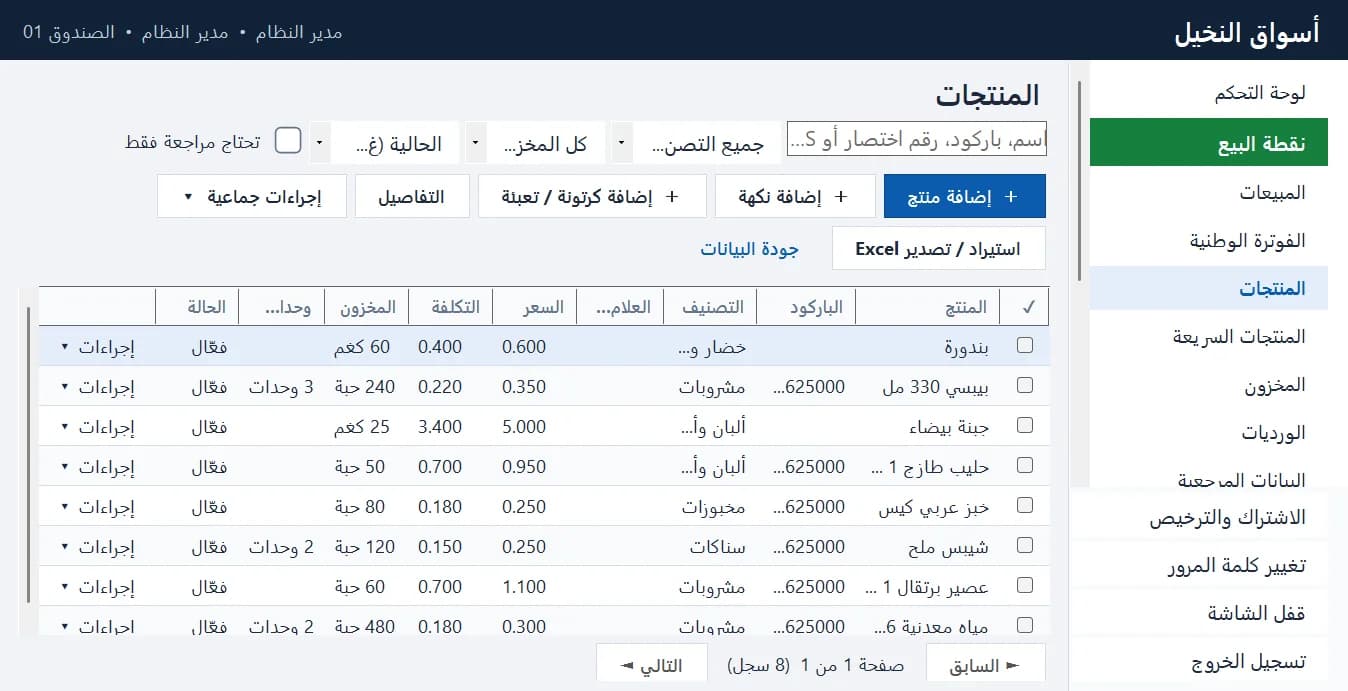
Products: search, filters, add a product, flavor or carton, Excel import · Arabic interface 2Add a product
Click “Add product”. Enter the name, category and product type (regular or weighed), then the sale price, cost and tax.
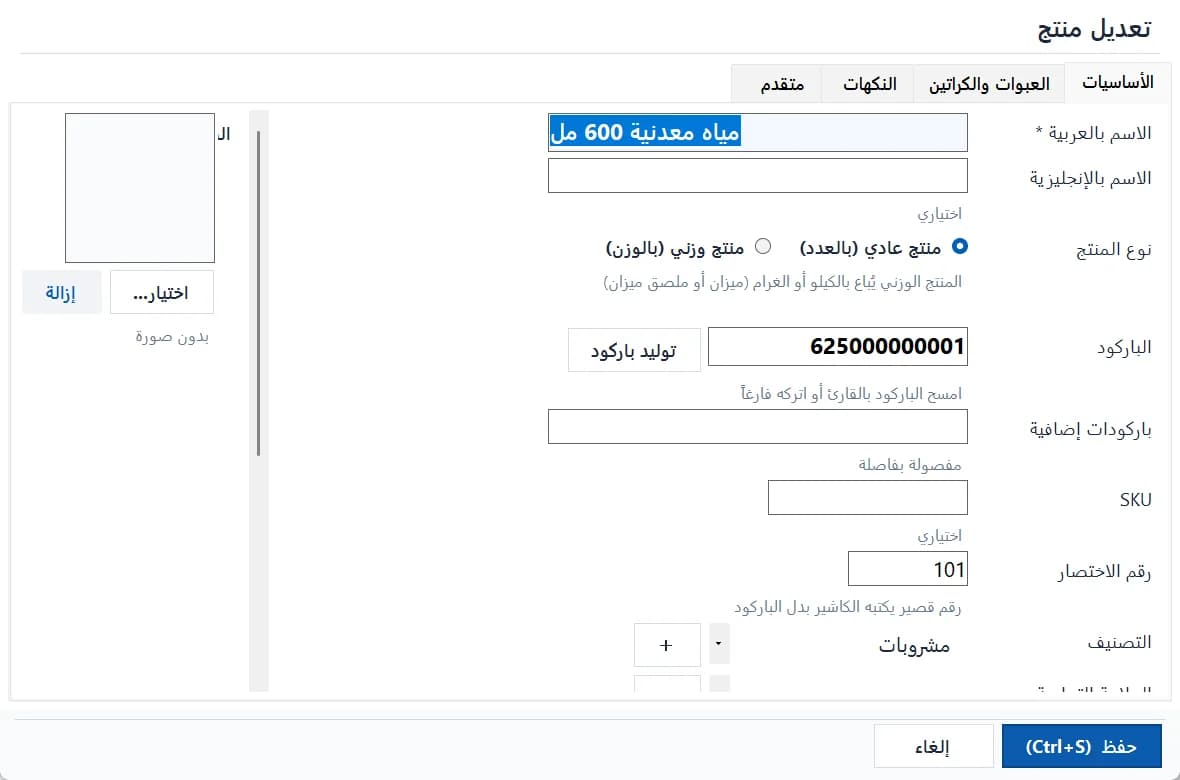
The product editor: units, prices, barcodes and selling mode · Arabic interface 3Units: piece, pack, carton
Add larger units with a factor (e.g. carton = 24 pieces), each with its own price and barcode. Stock is one balance counted in pieces, so selling a carton removes 24.
The “Add carton / pack” button on the Products page adds a unit to the selected product directly.
4Flavors and sizes
“Add flavor” creates variants (red, blue…) with a barcode each, sharing one stock or tracking stock per flavor.
5Quick codes and quick buttons
Give best-sellers a short quick code (like 101) the cashier can type, or add them to “Quick products” to show as buttons on the sales screen.
6Opening stock and counts
Enter the opening quantity when creating. Later use “Inventory” for counts, adjustments, damage and expiry — every movement is recorded.